Installation

Home Downloads Order  
 

Up
Products
Specials
Site Map
Support
Tech Info
Contact
Search


Advanced Features
Specifications
Receiver, Heavy
Receiver, Std
Receiver, Portable
Star Sync GPS Receiver
Star Card
Installation
GPS FAQ
Troubleshooting
Index


Other Receivers
Antenna Mountings
LAN Installs


Star Sync


How to install the Star Sync receiver and software

Installation

Quick Start
Step-by-Step Installation
Antenna Installation
Connecting Receiver

View the Installation Video

Quick Start
  1. Install the Star Sync software and GPS hardware.
    Connect GPS to the computer's serial port. Plug in power.
  2. Open up the GPS Setup screen in Star Sync
    Select the number of the serial port connected to the GPS receiver
  3. Select the model of GPS receiver in use from the pull-down and press 'Reset'
    Other options are automatically set once you select the model.
  4. Open the GPS Test screen, press the Open button
    The GPS data should now be visible in the data window.
  5. Wait till the GPS receiver gets fixed into position and synchronized.
    This normally requires 3 or more satellites visible with strength greater than '0'
  6. Check "Enable GPS as time base" on the GPS Option tab
    This sets ClockWatch to use the GPS as a time base
Step-by-Step Installation Instructions

Hardware Installation
If using Star Sync software with other receivers, check here.

1 Unpack

Unpack the GPS receiver and power supply. Locate the Star Sync CD-ROM.

2 Position the Receiver

Locate the receiver indoors or outdoors near a window.  For installation considerations see the antenna installation section below.

3 Plug in the Power Supply

Plug the receiver into the adapter (shown). Connect the power supply to the adapter (both 120VAC and 100-240VAC supplies are available)

4 Connect the Receiver to Computer

Connect the adapter to the computer's serial port. You can connect Star Sync to a USB port with a serial to USB adapter.  Note the number of the serial port you are using. More...
 

Software Installation

Install the Star Sync Software

Install the Star Sync software from the CD-ROM, follow the menu to install ClockWatch->Star Sync.

6 Configure the Receiver in Star Sync

Open the ClockWatch program. Open the GPS Setup screen (Options->GPS->Setup). Select the GPS Model  and select the number of the COM port where the receiver is installed.
 

7 Test the Receiver in Star Sync

Open the GPS Test screen (Options->GPS->Test). Open the connection and observe the data coming from the GPS receiver.  Receiver will take approximately 5 to 40 minutes hours to get a fix. Time signal is available after the receiver has fixed the position. More...

8 Set Star Sync to use GPS as Time Source

Set Star Sync to use the GPS receiver by ‘Enable GPS as time source’ (Options->GPS).  Set the interval (in minutes) how often Star Sync will check time.  Close the Options, Setup and Test screens.

9Monitor the Receiver from Star Sync

You can monitor the validation progress and time signal reception from the log window on the main screen of Star Sync.  After validation the window will show the time (in UTC) from the GPS satellites. More...

 
Start the Service in Windows
(optional)

After Star Sync verifies that the computer has been synchronized the ClockWatch Service can be started and run to keep the computer synchronized. This service runs whenever the computer is on and the Star Sync application need only be run to change settings.


GPS Antenna Installation

Antenna Considerations
The GPS antenna can be installed indoors or outdoors where an unobstructed view of the sky exists. Rooftops generally make good locations due to clear overhead sky with views to the horizon, allowing the antenna to see and track the maximum number of satellites throughout the day. Installations with obstructed views may prove operational, but may experience reduced reception quality and the inability to simultaneously track the maximum number of satellites. In addition to clear sky coverage, select a site which would not allow the antenna to become buried in drifted or accumulated snow.

Satellite Visibility
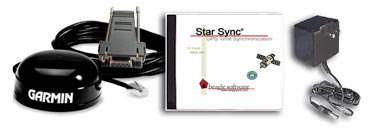
The Star Sync low profile antenna must be mounted with a full view of the sky.  It can view the sky through a window or my mounted outdoors. More...

Noise Sources
The antenna should be located at least 3 ft from electromagnetic noise sources such as transmitting antennas.

Cabling
The recommended cable type is  CAT-6 cabling.  Avoid sharp bends in cabling and routing near AC or current carrying wiring.
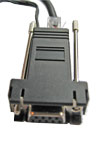
Connecting GPS Receiver to Computer

Plug the NMEA type data cable from the GPS into the computer’s serial port. The data cable usually has a female DB-9 connector at the end and plugs into an available serial port (usually named COM1 or COM2) on the computer.

The Star Sync heavy and standard duty receivers use a RJ-45 serial connector which plugs into a DB-9 adapter. The adapter plugs into the computer's serial port.

Plug the 5 volt power supply into an AC outlet (120VAC or 100-240VAC). Plug the power connection from the Star Sync receiving unit into the power supply.

Ethernet Installation options


Installation Video

A downloadable version of the Star Sync installation video is available.
It steps through the setup, installation and operation of Star Sync.
This is a low-resolution  version of the video included with the product.

Requires: Windows Media Player
Choose your connection speed:
   Dial-up
(up to 56k) Watch Video File Size: 1.1 Meg
 
 High Speed (DSL, Cable Modem, ISDN, T1 etc) Watch Video File Size: 6 Meg


For more information


Star Sync Product Information:
  Advanced Features
  Star Sync GPS Receiver
   
Troubleshooting
    Antenna Mounting Options
  Frequently Asked Questions about GPS

  Index

Star Sync Main Page


Questions?

For more information on Star Sync, please complete the information request form.  Or call us toll-free at 1-877-845-2549.


  Products | Specials | Site Map | Support | Tech Info | Contact | Search | Search
Copyright © 2007 Beagle Software. All rights reserved
Last reviewed March 19, 2008