PCI Version
Installation
Hardware Installation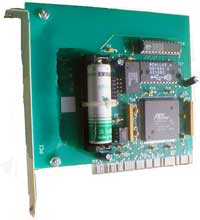
Insert ClockCard into an available PCI Bus Slot in your PC
-
While Windows is running, check the Device
Manager to see that it is clean (no question marks next to devices).
-
Shut down computer and unplug from wall. Remove
the cover to your computer's case.
-
Place the PCI Real Time Clock into an empty PCI
slot. Since the card is Plug 'n Play there are no jumpers to set.
Information for installing ClockCard in a
PCI Express slot.
-
Replace your computer's cover.
Complete installation involves installing the
physical card in the computer, installing the card driver software for Windows,
and installing the ClockWatch application software.
Software Installation
Driver Installation—Windows 98/Me Users
-
Turn your computer on and allow Windows to
load.
The Windows New Hardware Wizard will detect the PCI Real Time Clock as a “PCI
System Peripheral” or a “Base System Device”. Select the "Search for the best
driver for your device" option. Make sure the CD-ROM drive option is checked.
-
Place the provided CD-ROM in the drive. When
prompted by the New Hardware Wizard for the driver location, select your
CD-ROM drive.
Check “Specify a location” and press the ‘Browse’ button to browse for the
driver. The driver is usually at D:\ClkCard\Drivers\Drivers\Win98 on the
ClockWatch CD.
-
Windows will then install the driver: RTC
WinRT WDM Device. This is the device driver for the PCI ClockCard.
-
You can verify driver installation in the
Device Manager:
Open the Device Manager (Control Panel>System) and select the “Hardware” tab
The device will be listed as WinRT Devices>RTC WinRT WDM Device.
Verify that the device is working properly by selecting the device and viewing
its properties.
Driver Installation -Windows NT 4.0 Users
-
Turn your computer on and allow Windows NT to
load.
-
When prompted to login, you must log in with
either the machine administrator
account or a Windows NT domain administrator account.
-
Place the provided CD-ROM in the
drive. From the start menu, select the Run... option. Enter the command X:ClkCard\Drivers\install.bat
and press the Enter key, replacing X with the drive letter of the CD-ROM
drive.
-
Restart the computer.
The necessary software to operate the ClockCard
is now installed for Windows
NT 4.0. See Operating Instructions for steps to set the time.
Driver Installation -Windows 2000/XP/2003 Users
-
Turn on computer, start Windows XP/2003
-
In most cases Windows will
detect the PCI Real
Time Clock as a “Base System Device”.
-
Select the “Search for the best driver for
your device" (2k) or “Install from a list or specified location” (XP/2003)
option. Make sure the CD-ROM drive option is checked.
-
Place the provided ClockWatch CD-ROM in the
drive. When prompted by the
New Hardware Wizard for the driver location, select your CD-ROM drive.
-
Wizard will give listing of two drivers. If
asked to choose the driver for the
RTC WinRT WDM Device, select the Win2k driver located in the
..\drivers\win2k directory on the CD-ROM
Do not install the Windows 98 driver from the Win98 directory
-
If prompted, restart the computer.
Verifying Driver Installation
You can verify driver installation in the Device Manager:
-
Open the Device Manager: (Control
Panel>System>Hardware) or
(My Computer>Properties>Hardware>Device Manager).
-
The device will be listed as WinRT
Devices-RTC WinRT WDM Device.
-
Verify that the device is working properly
by selecting the device and viewing its properties.
Reinstalling Driver
If Windows fails to find device:
-
Open the Device Manager, which lists
ClockCard as: Other Devices>Base System Device.
-
Click the "Properties" on the Base System
Device.
-
Press "Reinstall Driver"
-
Place ClockWatch CD in CD-ROM and chose
"Install Software Automatically"
Wizard then installs the driver and finishes.
RTC Service Installation
Normally the Real Time Clock service is run in sequence with the ClockCard
installation script. If already installed, there will be a entry under ‘Real
Time Clock’ under the Windows Start menu.
If the RTC Service is not installed:
-
Choose Setup.exe from the ClkCard\Drivers
Directory on the CD.
This will start the “Real Time Clock” Service Installation.
This will install the service and necessary support files.
-
Reboot the computer at the conclusion of the installation.
RTC Service Initialization
The RTC must be initialized before running the
PCI ClockCard the first time:
-
In the taskbar, note a small clock face with
a red ring.
If the clock is not present then, start manually:
Select the Real Time Clock> Real Time Clock Setup from the Start menu.
-
Open the RTC service configuration by double clicking on the red clock face in
the task bar.
-
Set the local date, time and the offset from
UTC (UTC is the same as Greenwich Mean Time or GMT)
For EST set UTC to +5
For CST set UTC to +6
For MST set UTC to +7
For PST set UTC to +8
Subtract an hour to the offset for Daylight savings time (i.e. EDT is +4)
-
Press ‘OK’. The Service should now be
initialized and should maintain the time, even when changed from the Windows
Date/Time applet.
-
If the initialization fails, you may need to
manually stop the ClockWatch Service and start the RTC service to set the
local date/time and offset. After initialization, you can restart the
ClockWatch service.
Starting and Stopping RTC Service (Win
NT/2k/XP/2003)
To manually start and stop the RTC Service:
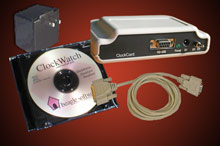
External Version
Installation
ISA Version
Installation
Hardware Setup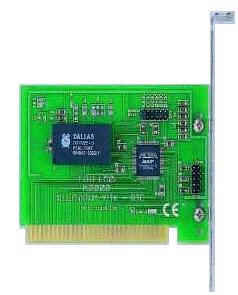
If the default jumper settings are correct,
installing the ClockCard card is merely a matter of
plugging it in. No other special actions have to be taken for the ClockCard to
work properly
If necessary, the address used by ClockCard can be set to
an address which doesn’t conflict with other devices in the host
computer. The ClockCard is shipped from the factory set for D000h. If you need to
change this address, select one which will not conflict with another device in the host
computer. The on-board jumpers allow selection of one of six discrete addresses in the
range of C800-DC00.
Inserting ClockCard into an Available ISA Bus Slot in your PC
-
The Beagle Software ClockCard is an 8-BIT adapter card that
may be installed into the 8-bit portion of any ISA, EISA or VLB (Vesa Local Bus) bus slot.
-
Optionally, you can connect one of the LED’s (for
example the Turbo LED) on the chassis. To do this, take the wire from the LED and connect
it to the pins marked "JP3" on the ClockCard. Note that you must connect the LED
the right way around. If in step 8 the LED on the card starts to flash, but the external
LED does not flash, then you have connected the LED the wrong way around. Reverse the LED
cable.
-
Switch the computer on. You should hear a beep as the
computer starts, and a message on the screen should appear to indicate ClockCard is working.
-
The LED on the ClockCard should start flashing. If you
connected one of the LED’s from the chassis to the card, it too should start to
flash.
-
Switch the computer off and then close the case of your
computer.
-
Your computer is functioning properly and the ClockCard is
now active.
Changing The Default
I/O Address
ClockCard occupies a single 4 Kb upper memory area (between
C800h and DC00h) address and
the ROM address in UMA to be used by it. When looking at the ClockCard card with its edge
connector pointing down, you can see the following arrangement of jumper pins:
ClockCard ROM address in UMA
UMA Address
-----------------
C800- CC00
CC00-D000
D000-D400 (default)
D400-D800
D800-DC00
DC00-E000
ClockWatch Software Installation
-
Install the ClockWatch software
from the CD-ROM, choosing the ClockWatch options to match your edition order
(i.e., Pro, Sentry or Server).
-
Reboot the computer
and test ClockCard by opening the ClockCard test screen
(Options>ClockCard>Test) in ClockWatch.
-
Enable ClockCard as a time base under the ClockCard
options tab (Options>ClockCard).
Operating Instructions
Set the Real Time Clock's time by
clicking the "Set Time" button in ClockWatch, which will check and set the the
time on ClockCard.
Any attempts to change the time without using
ClockWatch
will be reset to ClockCard's time within 10 seconds. Any other
deviation in
time will also revert to ClockCard's time within 10 seconds.
ClockCard Main Page
ClockCard Specifications
| 

