|
Receiver Location
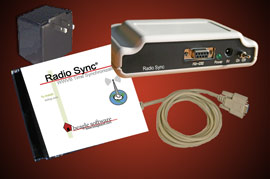
The antenna/receiver unit
is designed to be used indoors in a wood frame structure. Operation deep
inside metal buildings or buildings with metal reinforcements may be
marginal.
Orientation
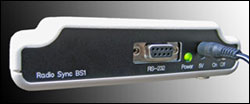
The antenna/receiver
should be mounted with the long side horizontal. It may be mounted either
flat on a table or shelf, or hung vertically on a wall with the connectors
on the bottom side.
The antenna/receiver is directional with best reception obtained with the
long side perpendicular to Fort Collins, Colorado. Orient the
antenna/receiver for steady blinking of the power/signal LED. After final
orientation secure receiver to prevent inadvertent movement (double sticky
tape is OK).
Noise Sources
Avoid locating near
suspected interference sources such as: Lamp dimmers, Fluorescent lamps,
Electronic igniters, CRT monitors, Battery chargers, Switching power
supplies, Motors, Automobile ignition systems, Power lines, Nearby radio
transmitters
Note: Interference is diminished by the square of the distance (i.e.,
doubling the distance from the source will reduce its effect by 4).
Broadcast Reception
In some areas of the country the signal may
not be available 24 hours a day. In these cases setup and initial reception
are usually best done at night. The unit is designed to keep accurate time
during marginal reception periods after time is initially acquired
Data
Cabling
The recommended
cable type is RS-232. 4-conductor telephone extension cabling may also be
used. Avoid sharp bends in cabling and routing near AC or current carrying
wiring.
Serial Cable Length Limits
(RS-232)
Table below lists the maximum permissible cable lengths
for various protocols at various representative data rates. These lengths
are as specified in the EIA RS232C, CCITT V.55 and RS422 interface
standards.
Material requirements:
-
Conductor
size and type: 24 AWG, twisted pair.
-
Nominal
capacitance: 15.5 picofarads per foot (between
conductors of each pair); 27.5 picofarads per foot (from each conductor to
shield).
-
Nominal
DC resistance (each conductor): 24.0 ohms per 1000 feet.
-
Nominal
DC resistance (shield): 2.35 ohms per 1000 feet.
-
Shield
type: Overall braided with drain wire.
Note on RS-232 Serial Cables:
At
lower peripheral speeds of up to 9600 baud, the normal baud rate used in
Radio Sync, serial interfaces can usually operate over cables up to 100 feet
long. Use of special high quality cable may in some cases allow this limit
to be extended to as much as 200 feet.
|